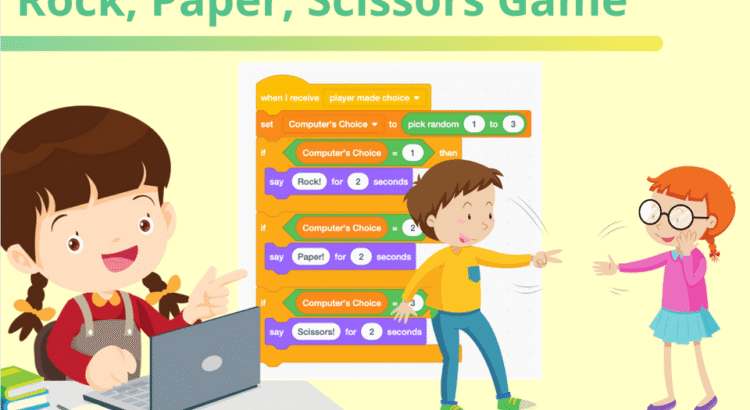
Enjoy playing rock, paper, scissors? Isn’t it cool to make stone, paper, scissors at the beginning?! Then you can play it anytime.
Early coding is a good way for children and teenagers to start learning coding and building fun games, stories and animations that they enjoy. To learn more, see the initial camp of award winner and early class (Scratch Junior class for K-2; Scratch Ninja class for classes 2-5; and accelerated Scratch class for class 5+) designed by experts from Google, Stanford, and Mit. Students with previous coding experiences can be started from the 2 class section above or enjoy the premature development of the game.
How to make stone, paper, scissors at the beginning of step by step
Projects that have been completed can be found here. Let’s learn how to make this project! Make sure you have an empty stroke project that is open to start making stone, paper, scissors.
1. Adjust your character and background.
Let’s start by choosing two sprite. Choose whatever sprite you want! Think about the theme you want for the game. One character will represent the player and the other will represent the computer. After selecting two sprite, add a background to your game. Be creative!
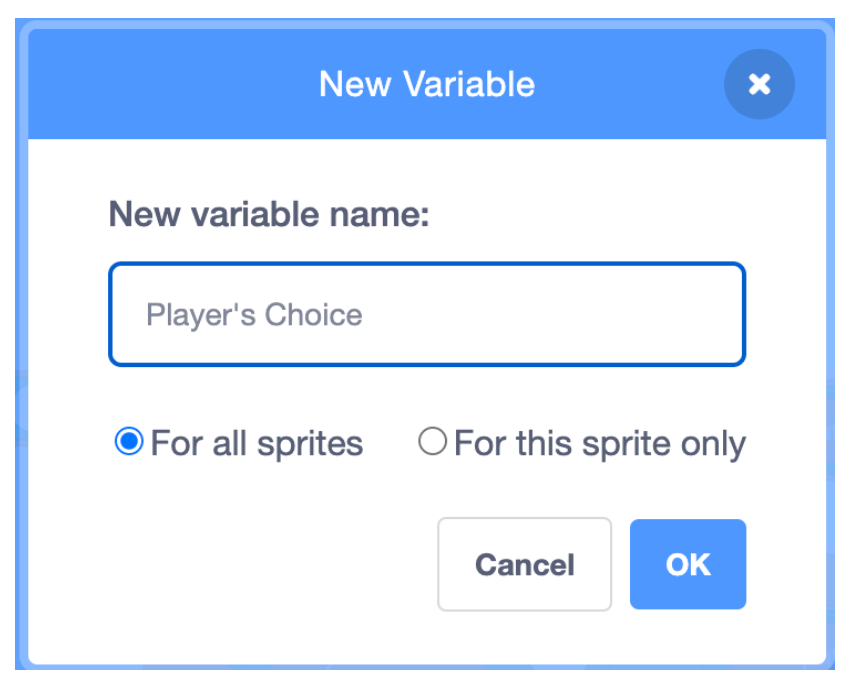
2. Create your variable.
Next, think about important information that is traced when playing games. This is stored in variables. . For example, we need to track the choice of players and computers. We also need to track player and computer scores. This means we need to make 4 variables in total! We can do this by going to the ‘variable’ category and clicking the ‘Make A Variable’ button. When you do this, make sure the option ‘for all sprite’ clicked. Here is an example for one of the variables called ‘Player’s Choice’
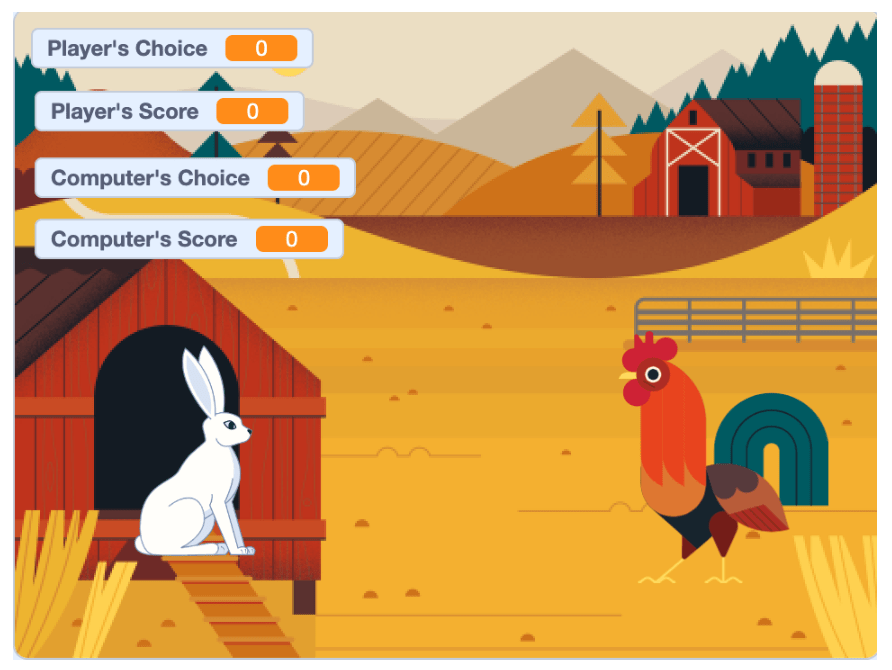
After you make four variables, your screen must look like this:
3. Reset variable to zero for each round
Variables are rearranged back to zero every game adding this code in the player sprite:
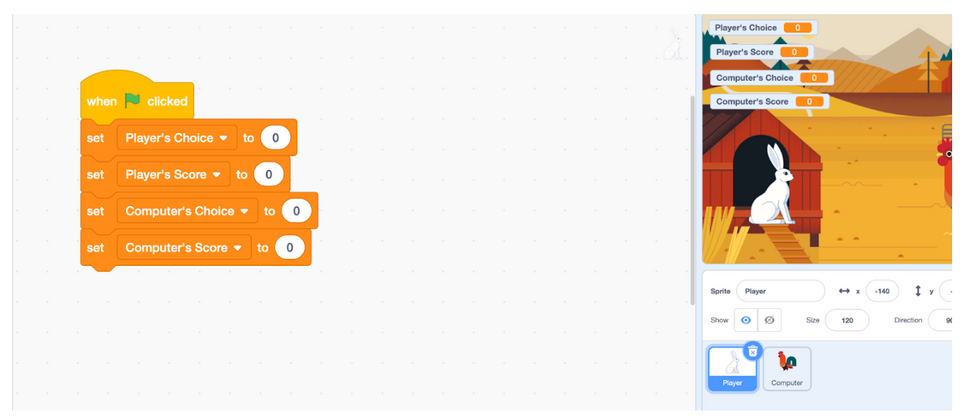
At the beginning of the game, players and computers have not made a choice so the score is zero for everyone.
4. Let the player choose rock, paper, or scissors
Our sprite and variables are ready so we can start coding for players. Look at the table below, this shows the keyboard key and the ‘Player Choice’ variable that is updated for rock, paper, or scissors. If players want to choose Rock, they need to press the ‘R’ button on their keyboard, and we will adjust the ‘player’s choice’ variable 1. If they want paper, they need to press the ‘P’ button, and the ‘player’s choice’ variable will be set 2.
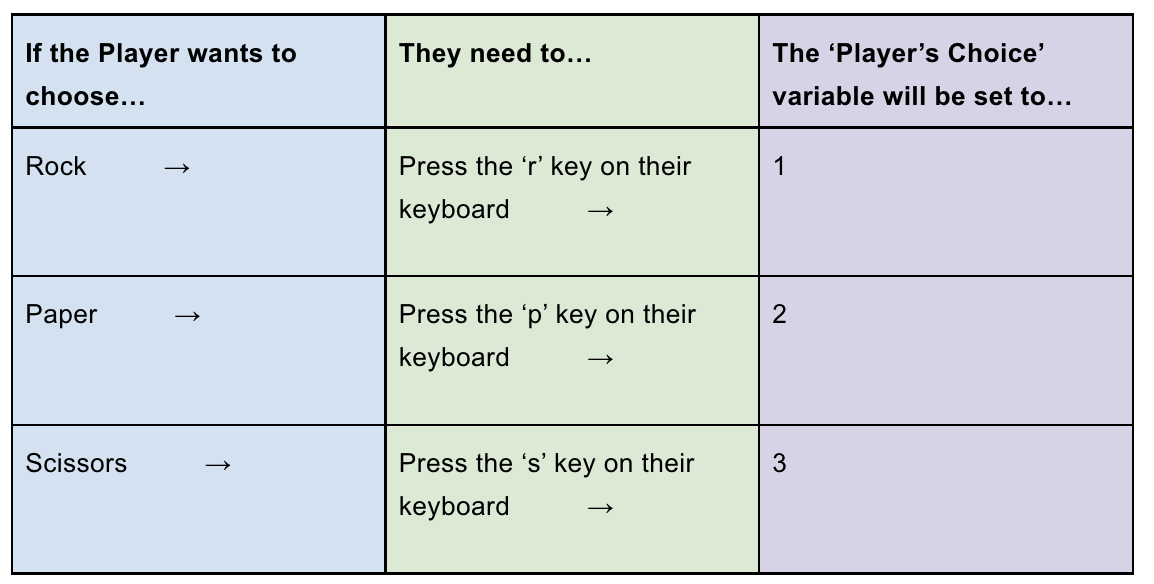
Make sure you understand what the table means before moving.
Now, let’s see how this is translated into code!
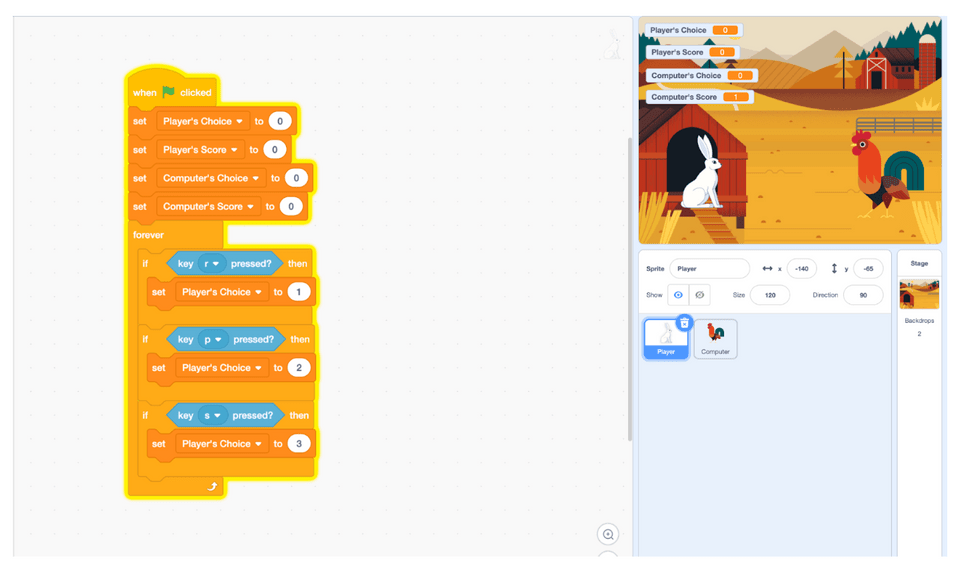
How do you check whether the player presses the button on their keyboard? (Instructions: Sense if the player presses the button.)
To do this, use 3 if-then blocks from the control category and keys are pressed blocks from the sensing category. Each If-Trans block will feel if the player presses a different button. After you have the three If-then ready blocks, don’t forget to add blocks forever around everything. This ensures that the game always checks whether the button is pressed. Inside, every if-then block, we need to set the choice of our players to the correct value. The code should look like this:
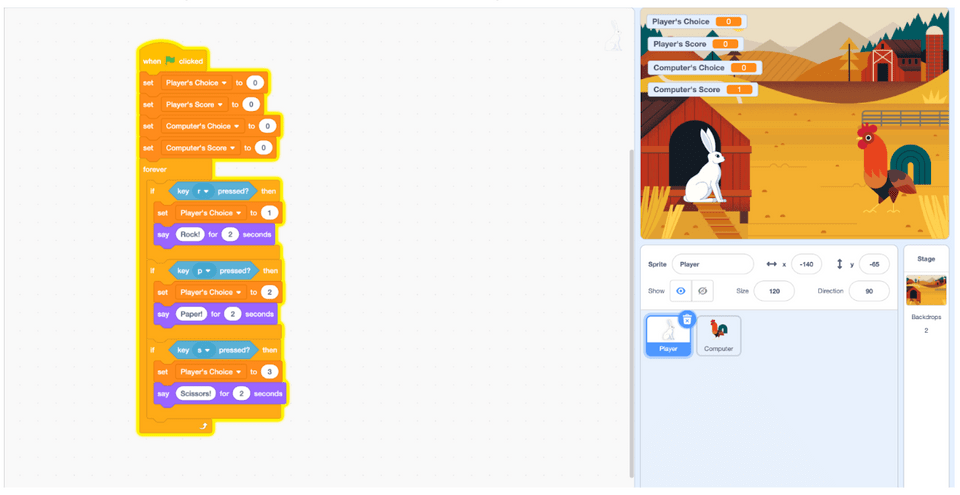
We can make this more interesting by making our sprite say something whenever the player chooses something. Your code can look like this:
5. Let the computer know you have to choose a stone, paper, or scissors
Now, that we let players make choices, we must let the computer know it can make their choice too. You might ask questions why players and computers cannot make choices at the same time, but do it this way makes it easier to get the right order of events. In particular, we do not want a computer to express their choices before players can choose.
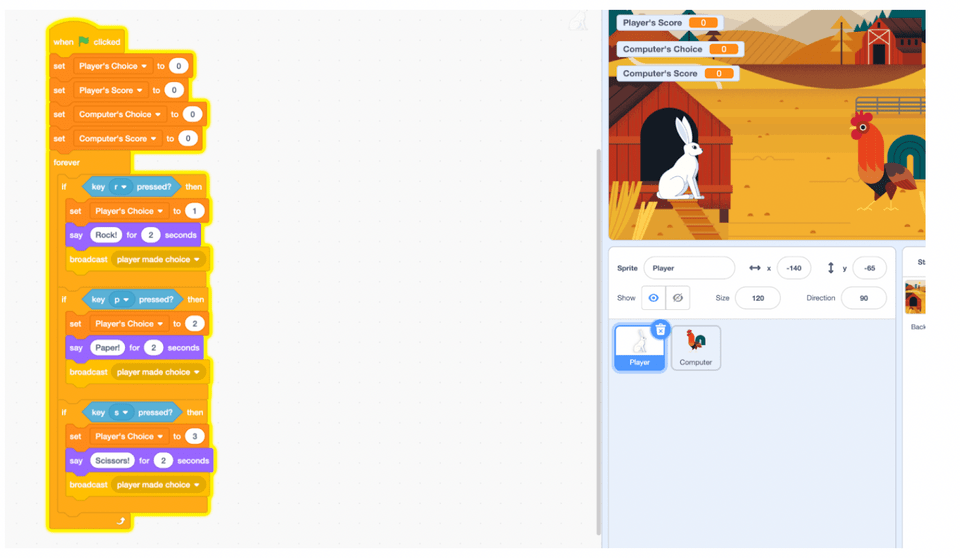
To make sure the computer knows its turn to choose, we will broadcast messages. You will find the block you need in the event category. Select and drag one block of broadcast message to each if-then block. Be sure to make a new message and call it ‘the player makes a choice’. Your code now must look like this.
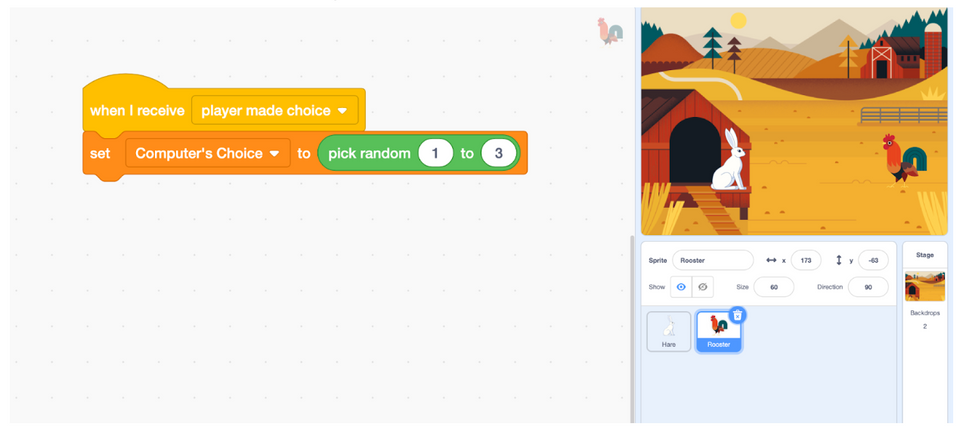
Next, the computer must be able to accept The message was so we needed a block from the event category again. This time, we need a block ‘when I receive’. This block will activate the computer code after the player makes their choice. Your code for the computer will look like this:

6. Make a computer select stone, paper, or scissors
Now the computer knows its turn to choose, we must add the code so that it can really choose rock, paper, or scissors. Because computers can’t think of themselves, we have to make him choose at random. To do that, we will need a ‘random select’ block from the operator category. This will allow us to choose a random number.
Remember from the table how we say that stones are represented by 1, paper is represented by 2, and scissors are represented by 3? We need to set our variable ‘computer choices’ to the random numbers that we made so we can track the options made by the computer. Your code will look like the following:
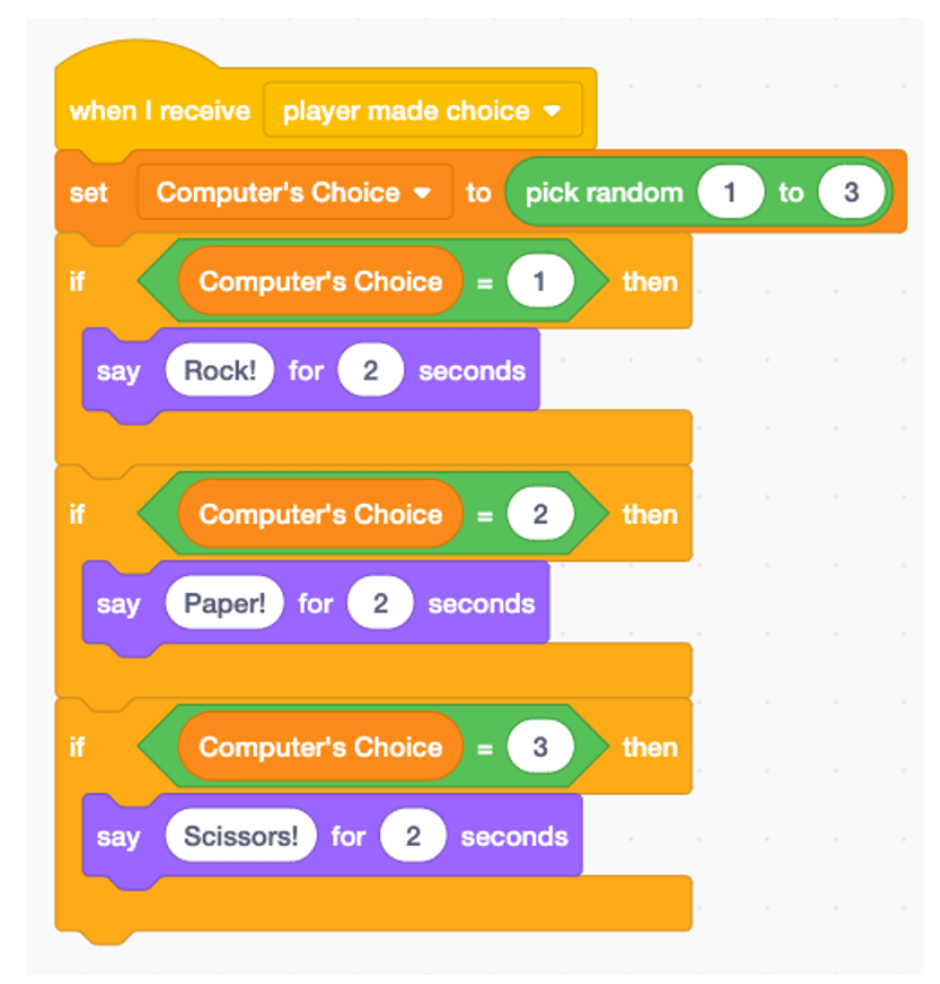
Now the computer makes its choice, we can make this more interesting by asking the computer to say it’s a choice. To do this, we will check what number ‘computer choices’ is the same as. If it is the same as 1, we will make the computer say ‘Rock!’. If 2, the computer will say ‘paper!’. Finally, if you are 3 years old, the computer will say ‘Scissors!’. How can we check whether one thing is the same as the other? We will use the block ‘=’ from the operator category with the if-then block!
Your code for the computer will look like this now:
7. Calculate the score
Now both players and computers have made their choices, what happens next we need to check who wins and updates our score variables! How do we know who wins?
This is why the variables of ‘player choices’ and our ‘computer choices’ are so important! They keep the choices of players and computers so we can compare them with each other by seeing who wins.
Let’s list all possible results:
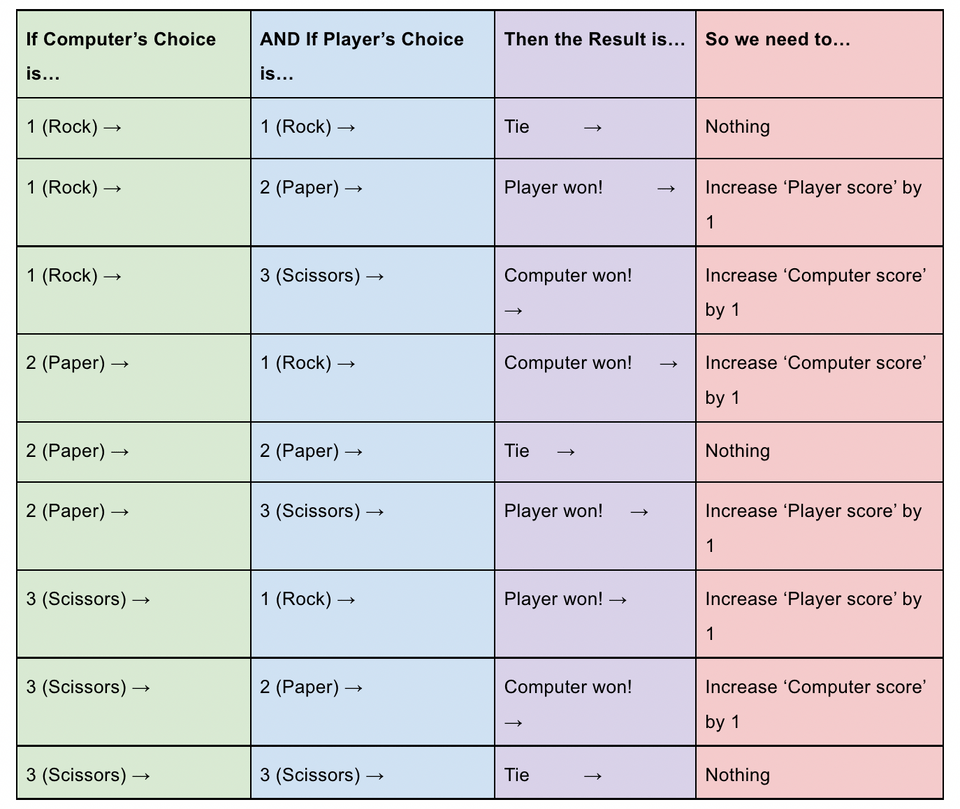
Let’s start turning this into a code.
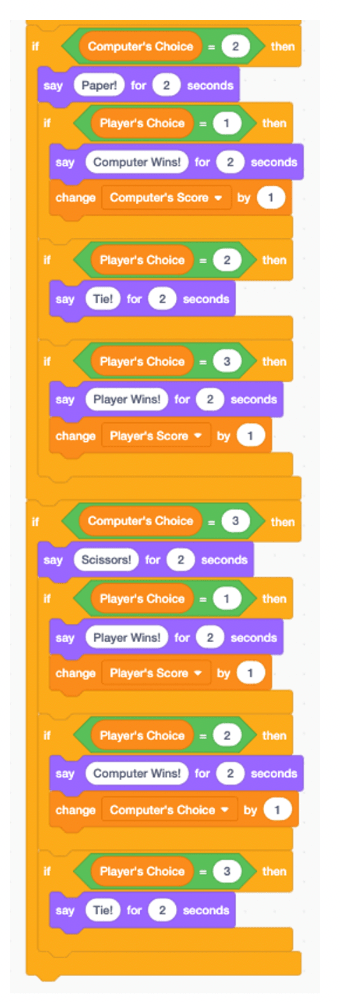
After the computer sprite announces what the choice is randomly chosen, we can use conditional statement to determine the results. We will make three conditional statements if-then, one for each of the possible players’ choices. For example, if the computer selects 1 (rock), then we will check whether the player’s choice is equal to 1 (rock), 2 (paper), or 3 (scissors). Depending on the player’s choice, we will announce whether the computer wins, the player wins, or if it is a tie. We can also increase player scores or computer scores depending on who wins the point.
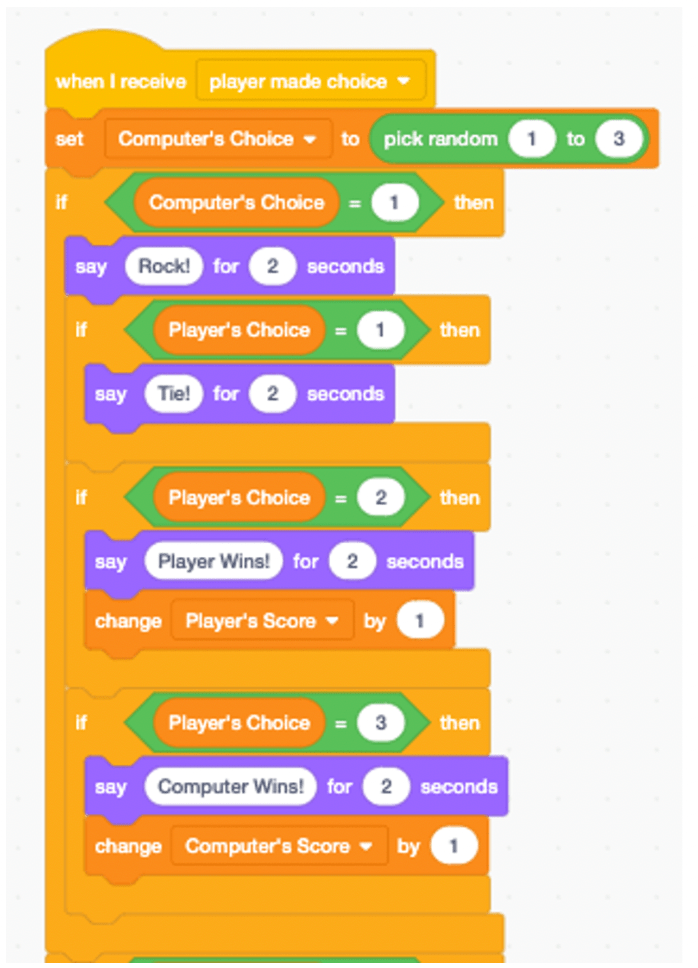
We will continue the process of adding three If-Than statements to conditional statements that check whether the computer choice is equal to 2 (paper) or 3 (scissors).
8. Win or lose a game
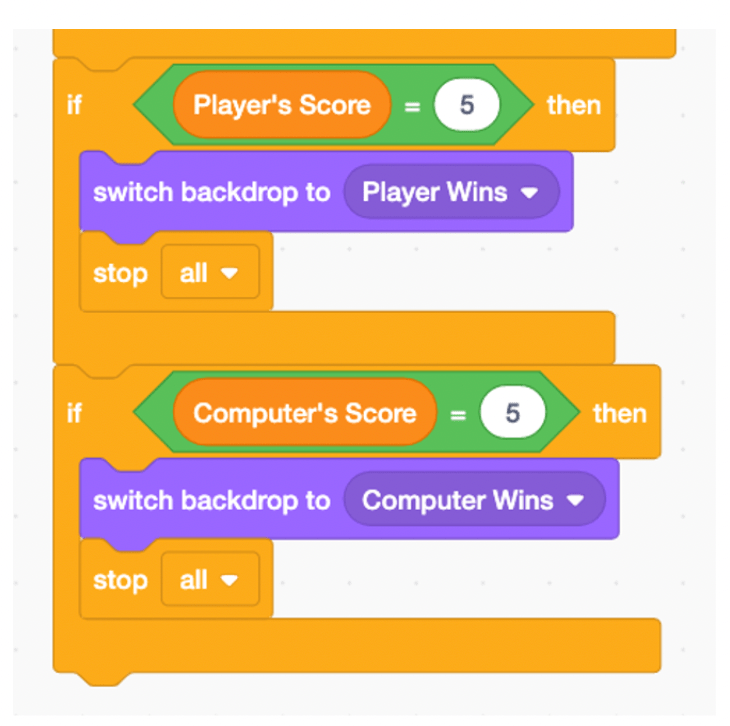
Finally, we can end the game if the player’s score or computer score reaches a certain target score. In this example, we will use a target score of 5 points, but you can adjust this number depending on how long you want the game to continue.
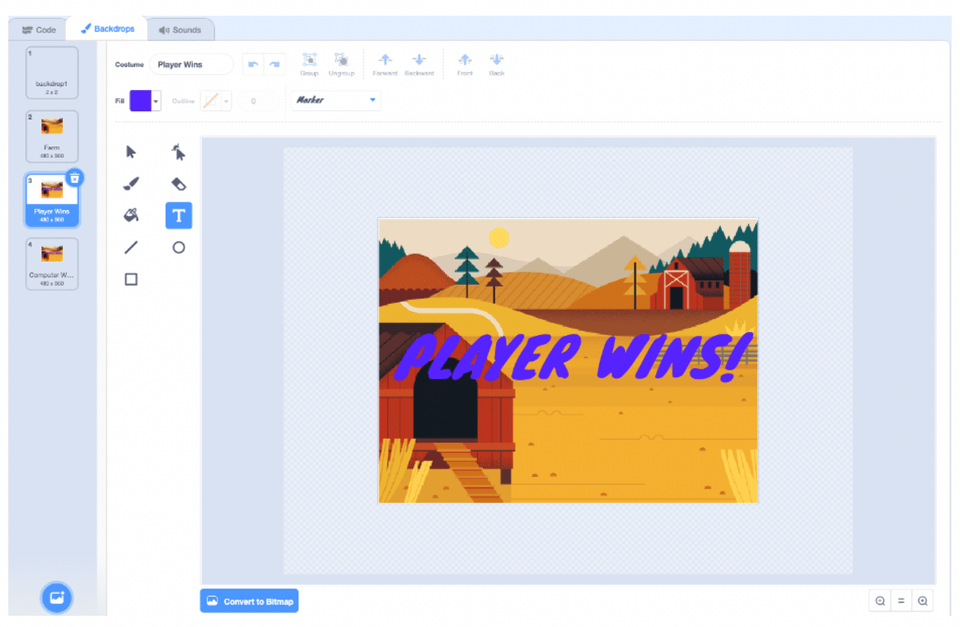
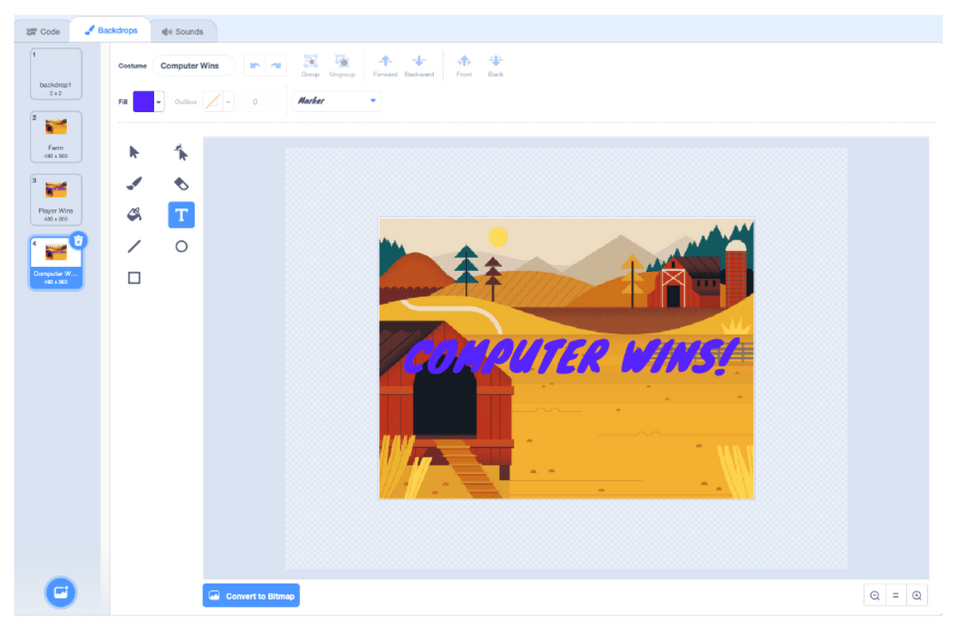
First, create a background that you will use, one if the player wins and another if the computer wins.
After your code calculates the score by determining who wins the points, you will ask the computer to check whether the player or computer has reached the target score. If the player score or computer score variable is equal to 5 (your target score), then change the background and stop the code.
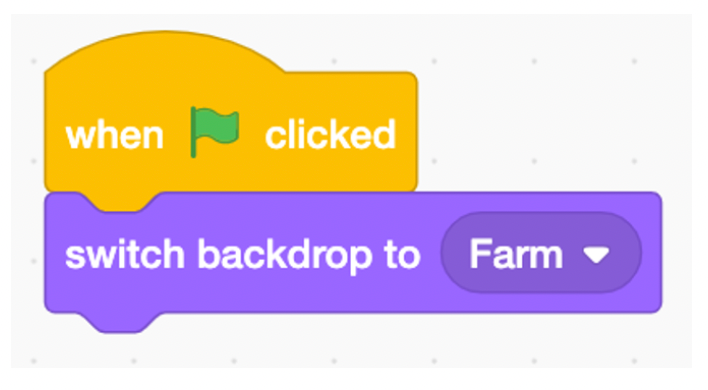
Don’t forget to change the background back to one without text when you click on the green flag.
Don’t hesitate to continue to add more features and capabilities to this game. Some suggestions include adding background music, animating sprite, or even making two players from this game. Be creative and most important, fun!
Make stone, paper, scissors at the beginning
Next, take more fun challenges with the best games to be made at the beginning. To learn more about the initial coding with the help of direct experts in the settings of small groups that support, register your students in the first free class to come. They can even get a certificate!
Written by Matt Kalnay, Create & Learn Instructor. After graduating from UC Davis with BS in Biology, he joined Peace Corps Indonesia as English as a foreign language instructor. After returning to the United States, he decided to pursue his desires in the field of software engineering and web development.
Game Online
Berita Olahraga
News
Berita Terkini
Berita Terbaru
Berita Teknologi
Seputar Teknologi
Drama Korea
Resep Masakan
Pendidikan
Berita Terbaru
Berita Terbaru
Berita Terbaru
A gaming hub can refer to a central platform or space dedicated to gaming, where players can access games, interact with other gamers, and enjoy related content.