Early coding offers many ways to improve projects, and one of them is to add music and sound! So today you and your child will learn how to make music and add sound at the beginning. There are many options to add adjusted and recorded sounds before.
For direct expert guidance to make fun games and animations with coding, join our initial class who won an award, designed by professionals from Google, Stanford, and MIT.
Find How to Make Music in Early
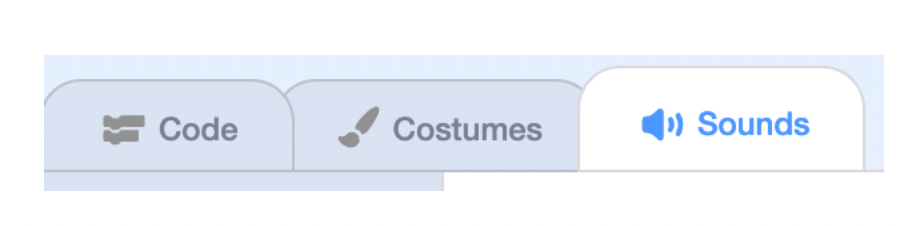
To add music and sound to your initial project, you have many choices. One of the places to start is the “sound” panel on the top left.
Scratch has hundreds of votes that have been recorded before that you can add to your project. To do this, click the “Add Sound” symbol at the lower left. Then you will see all the available options! You can scroll them or search in categories such as “animals”, “percussion” or “strange”. You can even use a search bar to see if there are specific sounds such as growl, meow, or bark! Press the Purple Play button next to the sound to review before you select it for your project.
The sound you choose here will now be available in the dropdown menu in the coded coding block category. Most sprite only has a sound associated with them to start (like Meow for the Cat). Some sprite will only have a pop sound. After you add more sounds, in the sounds tab, your sprite will have more options to choose from!
How to upload music to scratch
Another option is to upload sound files or music from your computer. Navigate the symbol of “Add Sound”, then click the “Upload” option at the top of the selection that appears. Now you can choose the file from the computer you want. Another option is to upload sound files or music from your computer. Navigate the symbol of “Add Sound”, then click the “Upload” option at the top of the selection that appears. Now you can choose the file from the computer you want. Scratch supports mp3 and wav sound files. Make sure to only use the sound you have permission to use!
You can edit whatever sound you upload like a sound that already exists in the initial library. Make sure to change your voice name to be more descriptive if needed.
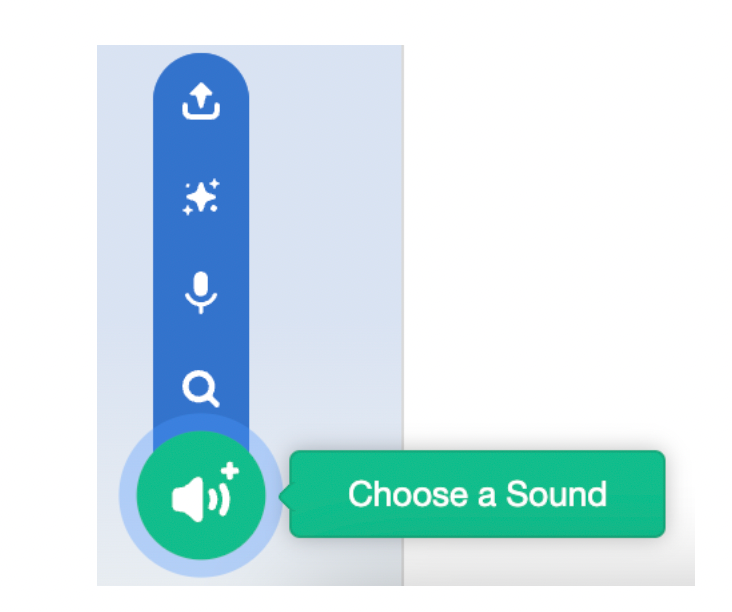
If you want to record sound, you can do it too! Navigate the cursor to the symbol of “Add Sound”, but this time select “Record”, which is the third option from above. Be sure to activate microphone access. Then click the button on the pop up screen and start recording.
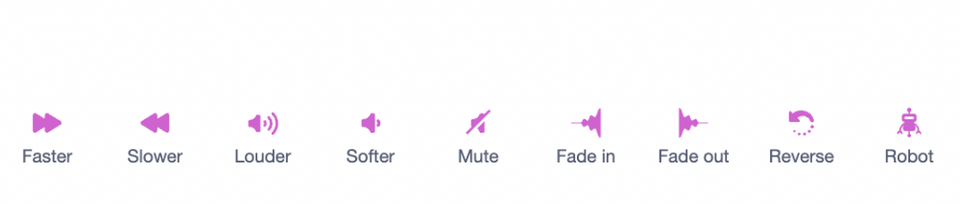
After the perfect sound is recorded, you have many options for customization. You can change the speed and volume, or play -playing with effects like Fade in/Out. If you make a mistake, you can always cancel it using the back arrow next to your voice name. This customization option can be used on the sound from the initial library, the uploaded voice, or the sound you record. With this option -option, the possibility is unlimited!
How to make a music loop at the beginning
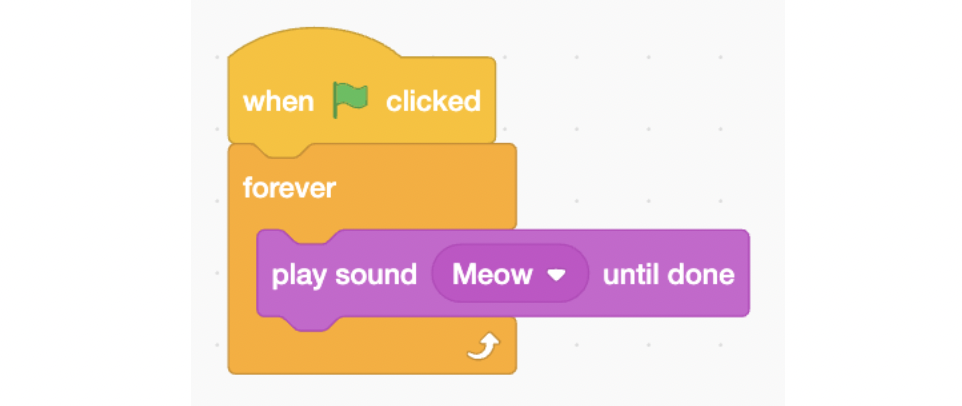
In your project, you might want to encode background music for different projects. To do this, you want to make a music circle. The first block you need is “when green flag clicked” from Program part. Then you need a block to run a loop from Control part. If you want the sound to repeat the entire project, use the “Forever” block. If you just want to repeat a few times, then use the “Repeat” block and change the number to what you want.
Finally, in your circle, you want to place “Play Sound to Completion” Voice block. This ensures that all soundtracks are finished before wrapping again. Only the sound selected from the sound tab that will be seen in the dropdown menu. Each sprite will have their own vote list. Return to the voice tab if you want more options or listen to different sounds before adding it to your code. Your last loop looks like this.
Using the extension of the instrument at the beginning
Returning to the “Code” tab, the “music” extension is another way to add sound. The extension button is in the lower left corner. Extension allows you to add new blocks to your code that does different things. The new block will be under their own category and will become mint green.
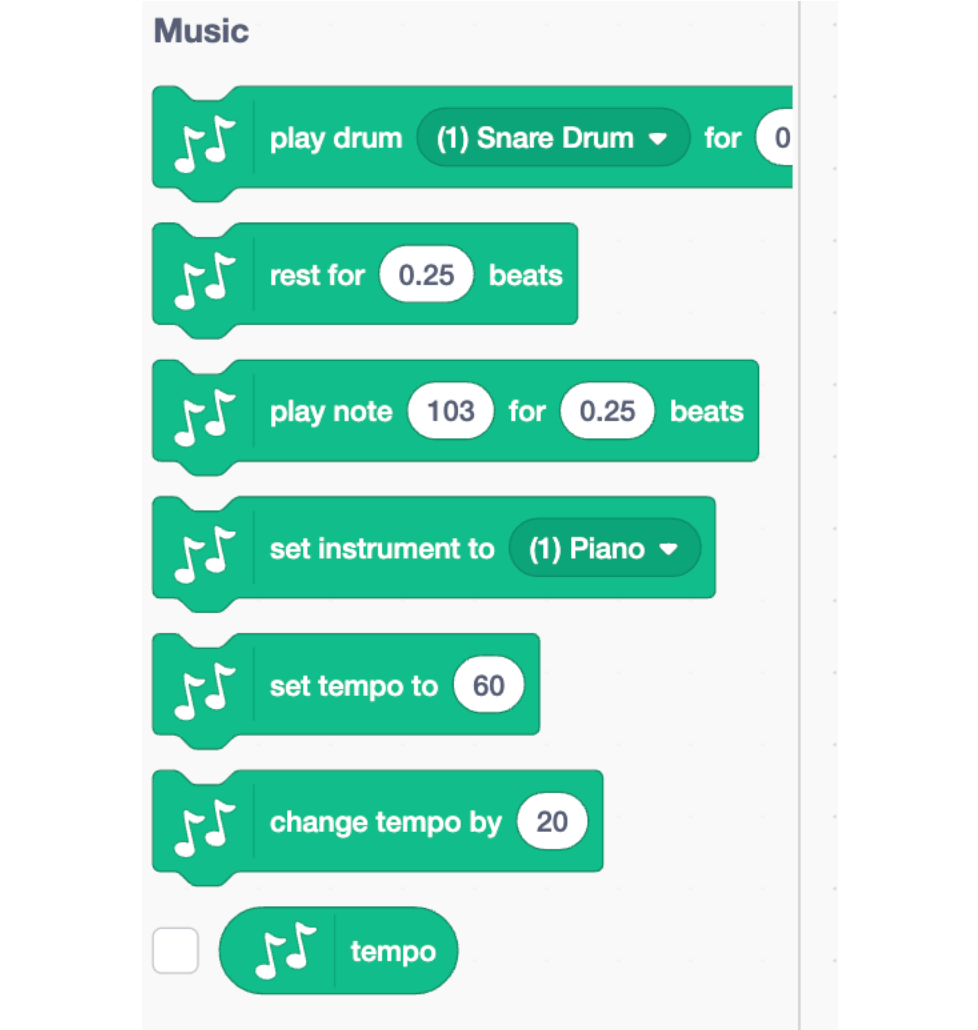
Now you have a completely new drag and drop block set to use! You can choose percussion instruments ranging from drum snare to cowbells. Different blocks allow you to choose instruments like piano or clarinet. Another block allows you to adjust the tempo or duration of the record. Fasting -fun exploring and trying different blocks. For example, the tempo block will change how fast or slow down your music will be played.
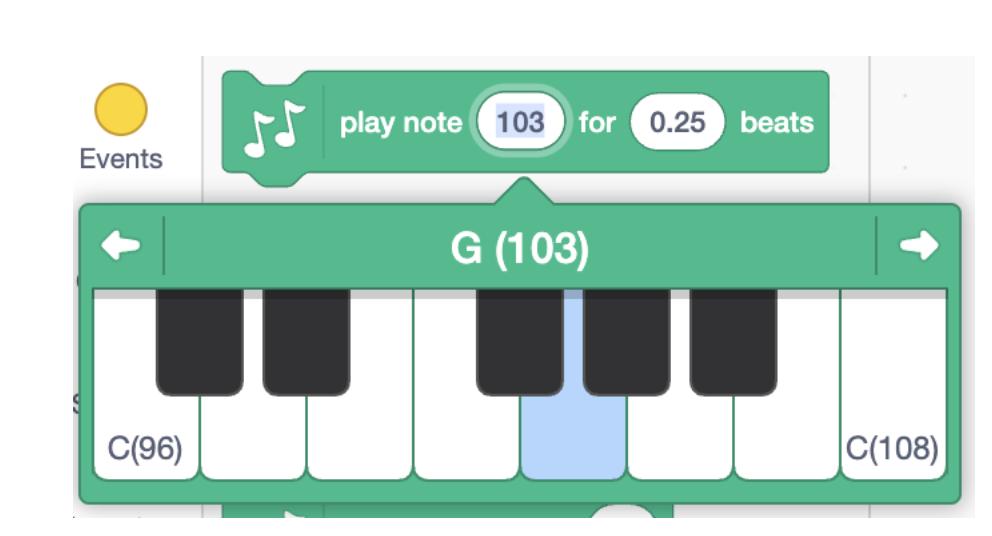
One way to be creative is Play Note block. The first note determines the block tone. The greater the number, the higher the record. You can also use interactive piano that appears to test various notes. The second number in this block allows you to set how long to play notes.
Tips for ordinary bugs that are found when trying to add sound
1. Make sure your voice files are supported and imported correctly
Before adding music, make sure the sound files are in a format that is supported by scratches, such as MP3 or WAV. If the file does not import correctly, try conversion to one of these formats using free online converters. Be sure to get help from a trusted adult before uploading or downloading files from the website.
2. Check the volume and synchronization levels
Use the “set volume to” and “play sound” blocks to manage volume and synchronization. Adjust the volume to the appropriate level so that music does not defeat other voices in the project. Your music test often to see how your changes affect music!
3. Avoid the advantages of your project with many sounds
Manage sound files carefully to prevent your project from being too complex or slow. Only use an important sound and make sure to stop one sound before starting the other if it is not allowed to overlap. Place the “Stop All Sounds” block before the “Play Sound” block to ensure that only one vote is played at once.
Look at the cool scratch project with music
Need some ideas for inspiration? Explore some of the extraordinary initial projects that improve their impact with music.
- Pumpkinoids uses a laser sound to complete visuals. This project was created in the Create & Learn’s Scratch Ninja class.
- Egga’s time travel adventure uses sound to add tension. This project was made in an accelerated early class.
- Macintosh 128K uses a computer sound as a special effect. This project was made in our initial Ninja class.
Make music at the beginning
Now you can take the initial project that you already have and add your own music creations, or start a new project! You can experiment with different initial concepts, such as having a sound game when you click Sprite using conditional. There are many music -themed sprite available at the Sprite library. If you are interested in learning more, us Scratch class And Scratch Camp is a good way to learn how to build stories to accompany the addition of music. Next, find out how to make a jumping game at the beginning.
Written by Sophie Andrews, Create & Learn Instructor. Sophie Andrews is a student at Stanford University who studies mathematics and computing. He likes to teach and is a teaching assistant for the Computer Science class Introduction to Stanford. His work focuses on data science. Last year he built an online national voice tracker for Cook Political Report, and currently he leads the data team at Stanford Daily. He is also internated with FCC and national renewable energy lab.
Game Online
Motivation
News
Pendidikan
Pendidikan
Download Anime
Gaming Hub
A gaming hub can refer to a central platform or space dedicated to gaming, where players can access games, interact with other gamers, and enjoy related content.

